Open Ephys GUI
Modular, open-source software for extracellular electrophysiology.
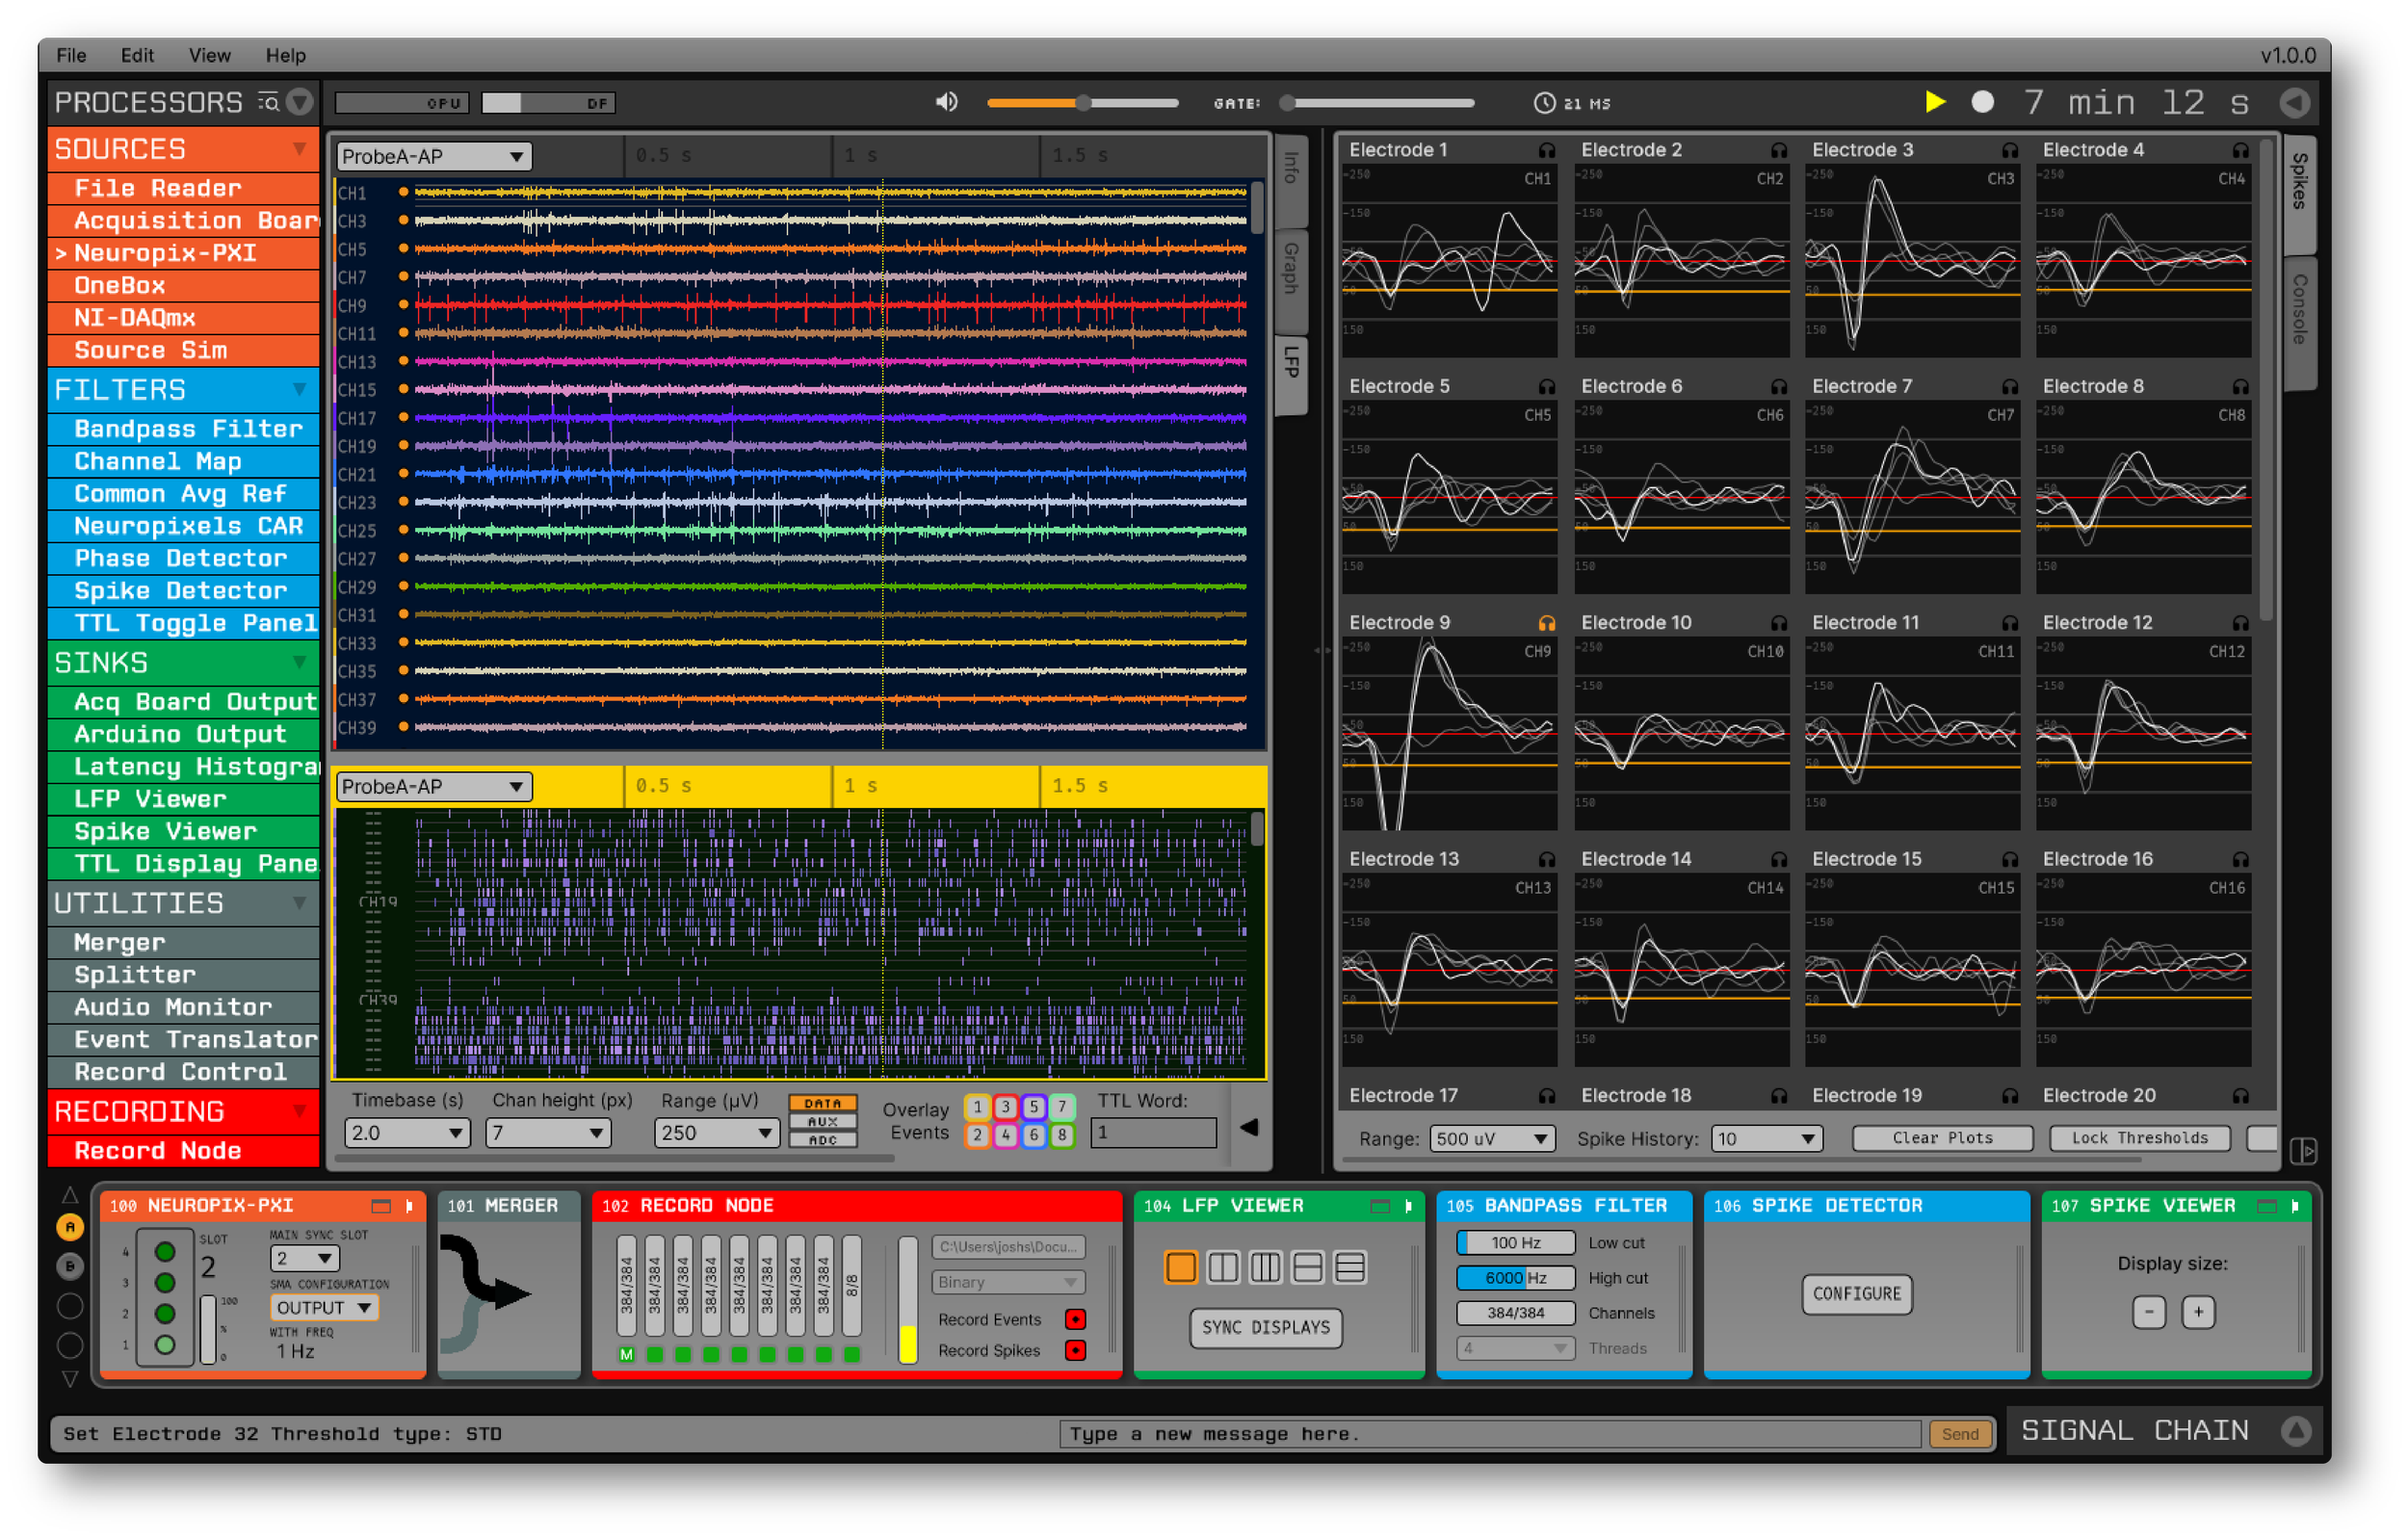
The Open Ephys GUI was built by neuroscientists, for neuroscientists. It has all the features needed to acquire and visualize your data—while also making it easy to add new modules written in C++.
Rather than having a hard-coded signal chain, the GUI allows the user to configure processing pipelines by mixing and matching modules. This makes it simple to set up the software for new experiments, especially those involving closed-loop feedback.
The GUI was inspired by software for audio processing, and is built on top of the JUCE audio processing library. This ensures that data is handled with low latencies, even for complex signal chains.
Features
Works automatically with the Open Ephys acquisition board, Neuropixels probes, and Intan recording systems
Channel count limited only by computer processing speed
Define your own signal chain, or load a standard configuration to get up and running immediately
Flexible LFP display with overlaid events
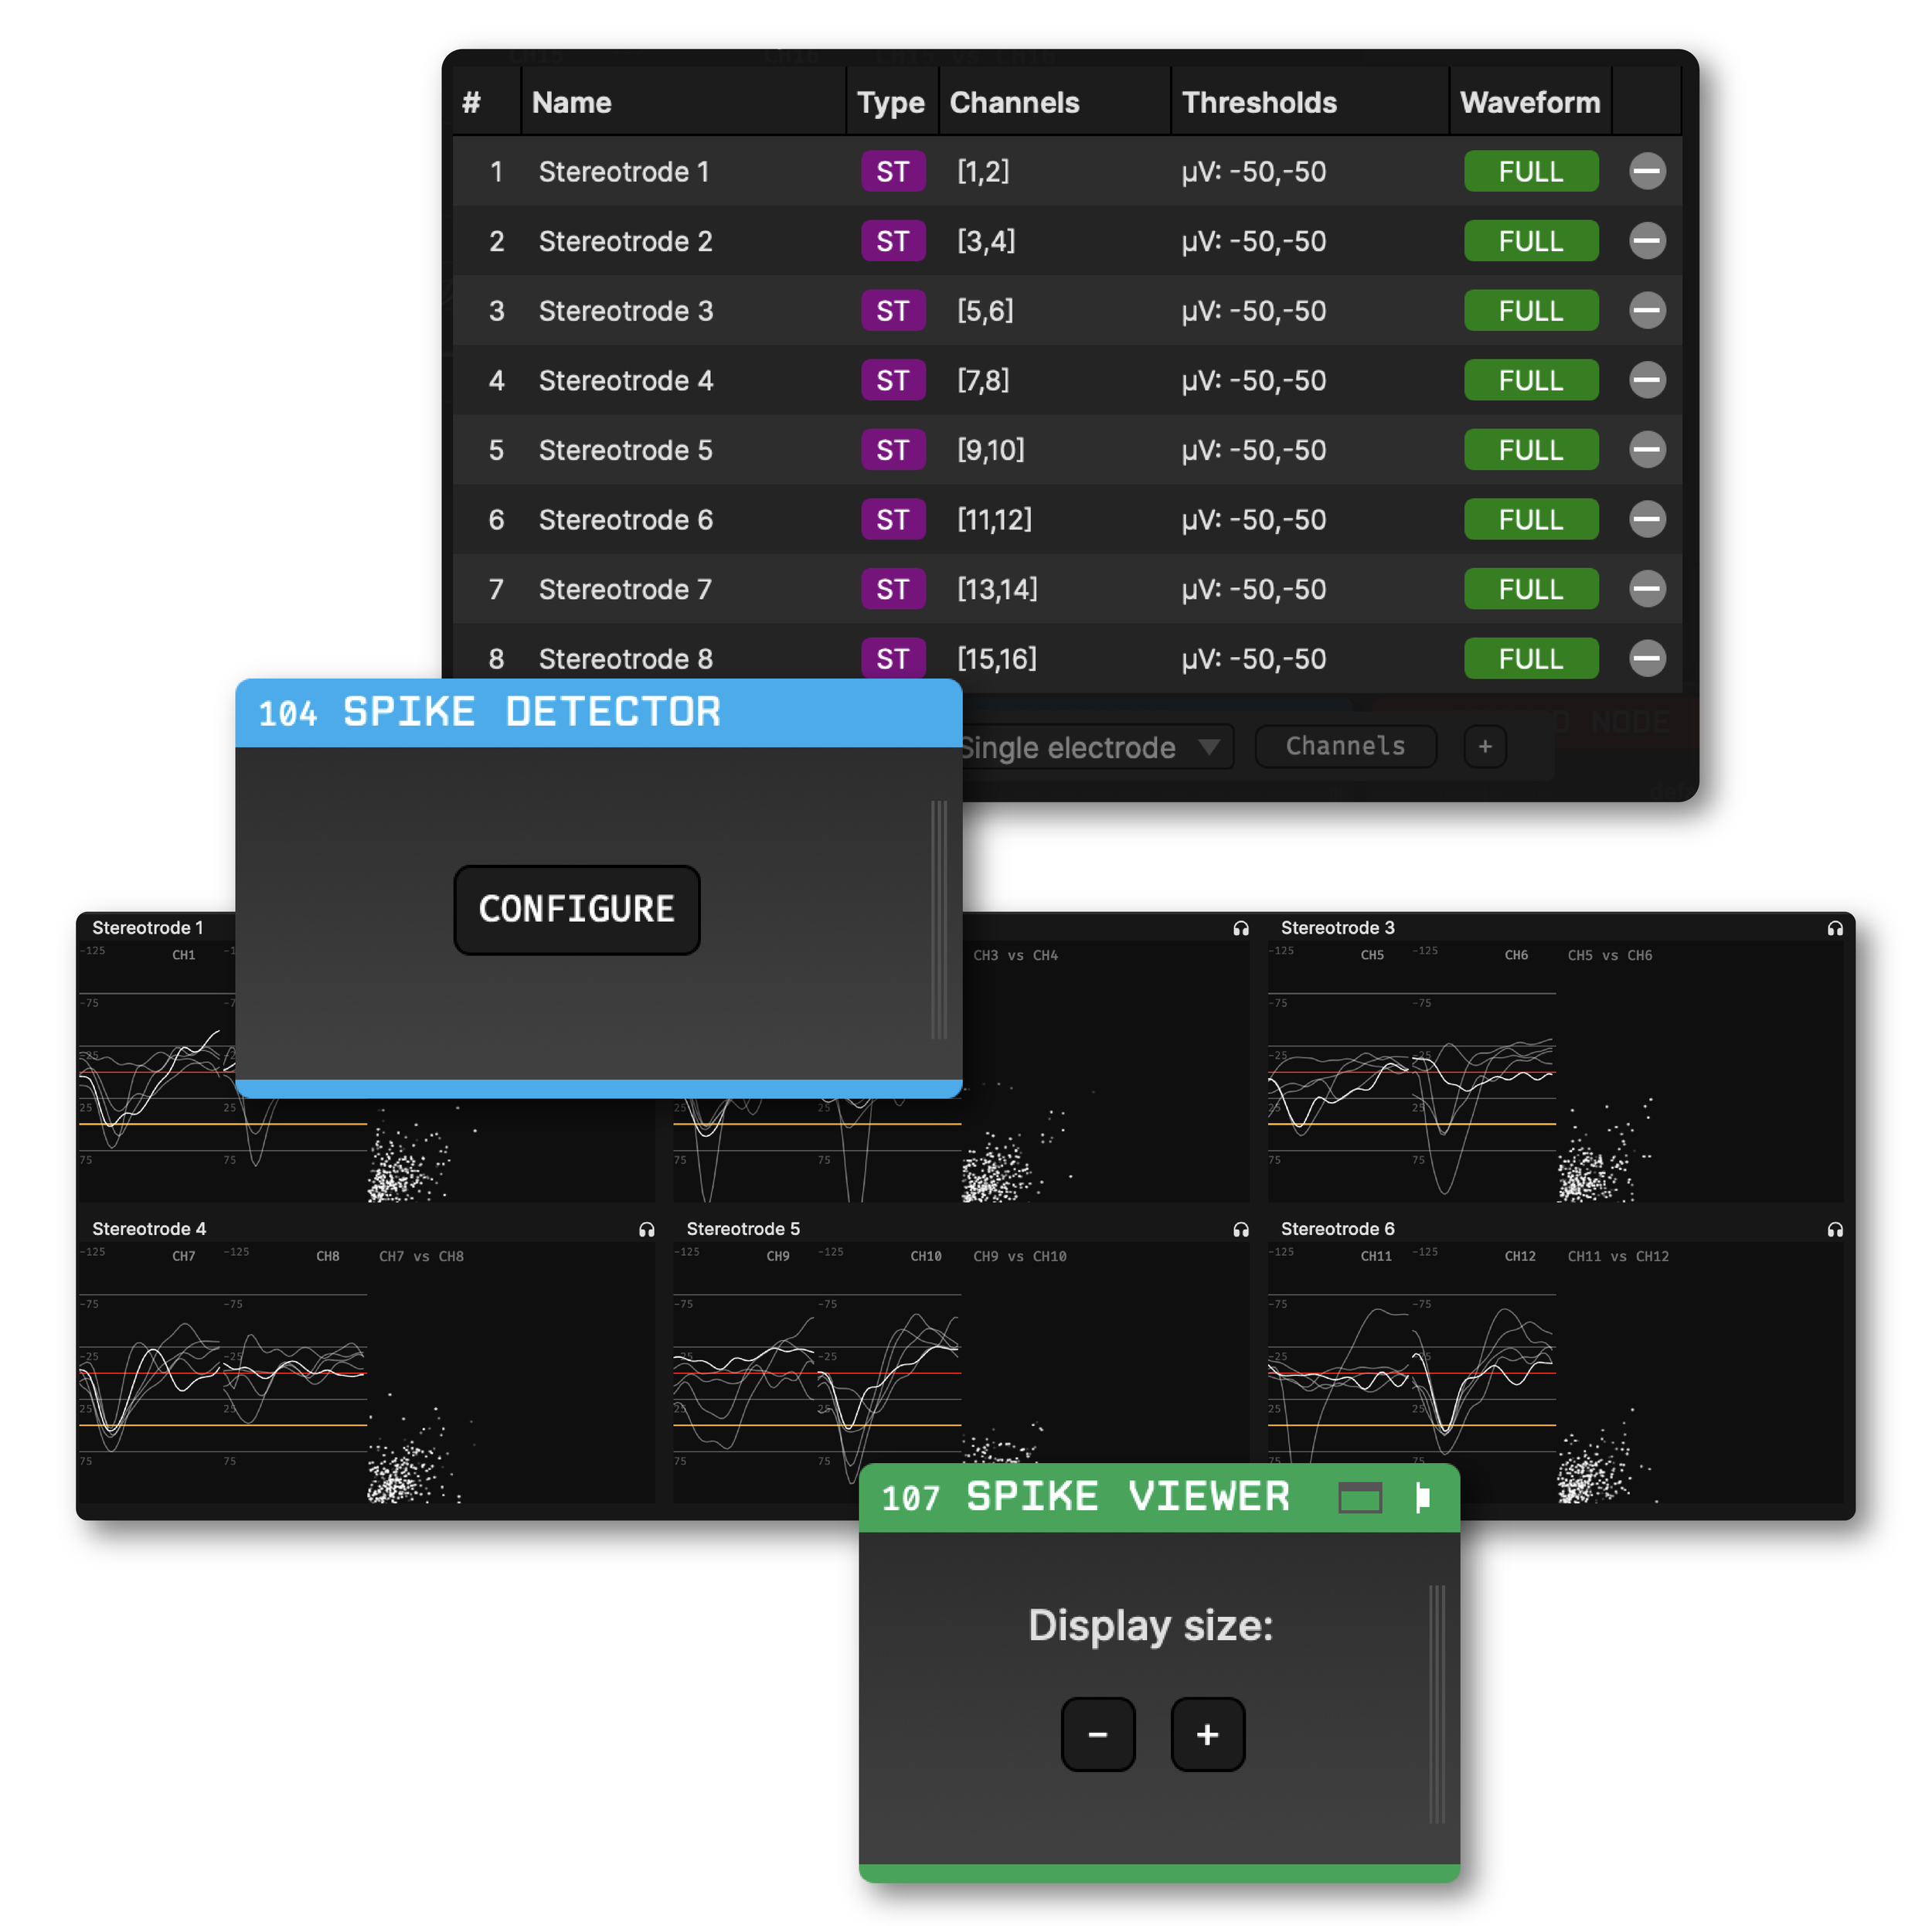
Spike extraction and visualization for single electrodes, stereotrodes, and tetrodes
Built-in audio monitor
Digital referencing
Designed to be extended with Plugins
Tutorial for new users
Flexible spike detection and display.
The GUI was purpose-built for processing data from extracellular electrodes. It can extract spikes from many electrodes in parallel, whether they're configured as single electrodes, stereotrodes, or tetrodes. The Spike Viewer automatically displays waveforms and peak height comparisons, making it easy to see which electrodes are picking up units. You can even sort spikes based in waveform and/or PCA space using the Spike Sorter plugin.
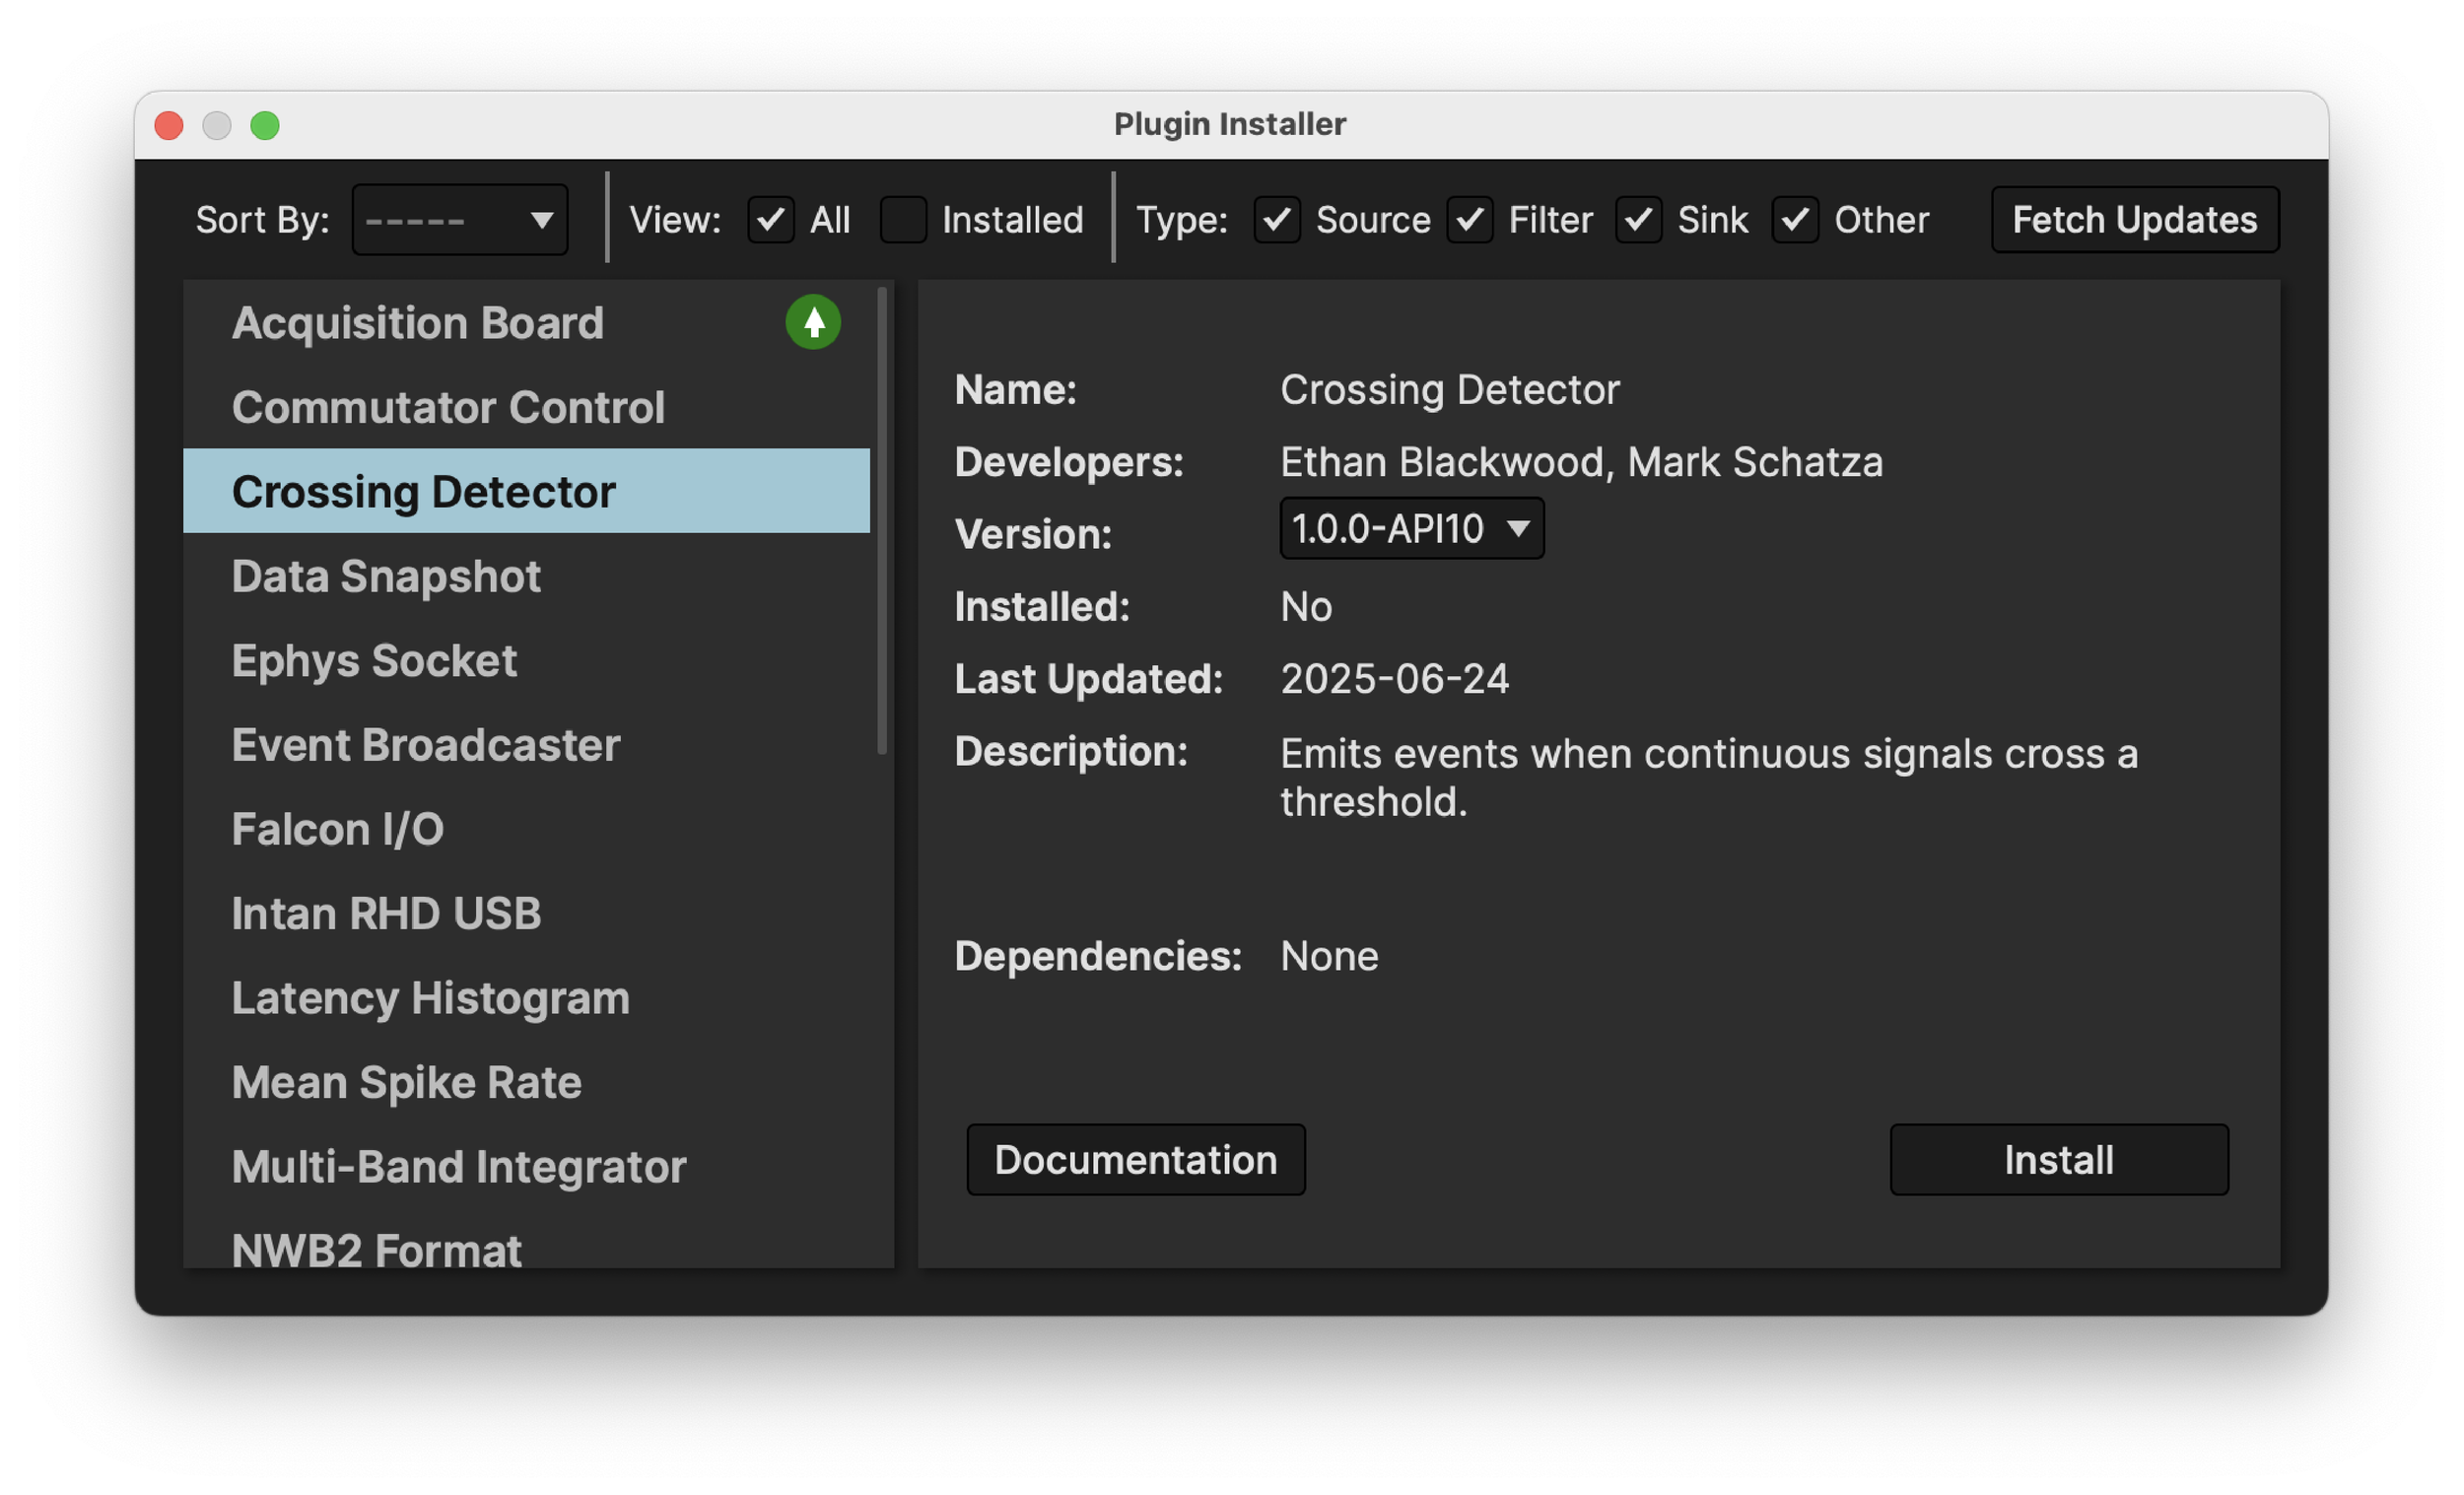
Add new functionality through plugins.
New plugins can be added and upgraded with a single click using the GUI’s built-in Plugin Installer. From inside the GUI, just press ctrl-P (or ⌘P on Mac) to bring up the installer, then browse to the plugin of interest. Available plugins include a Phase Calculator for delivering feedback at precise phases of ongoing oscillations, a Multi-Band Integrator for detecting changes in specific frequency bands, an Event Broadcaster for streaming spikes and events over a network connection, and many more!
Optimized for closed-loop feedback.
One of the key advantages of the Open Ephys acquisition system is its prioritization of closed-loop feedback. Our software makes it easy to mix and match modules for acquiring data, detecting events, and sending triggers to external devices. The figure on the right depicts one possible configuration based on the Open Ephys Acquisition Board and a Pulse Pal. In the middle, the histogram shows the amount of time elapsed between an event occurring and the feedback being delivered (measured for 1000 events). The delay is never more than 20 ms, and it's around 11 ms on average (black dotted line). This is short enough to facilitate a wide range of closed-loop experiments.
Designed to be customized.
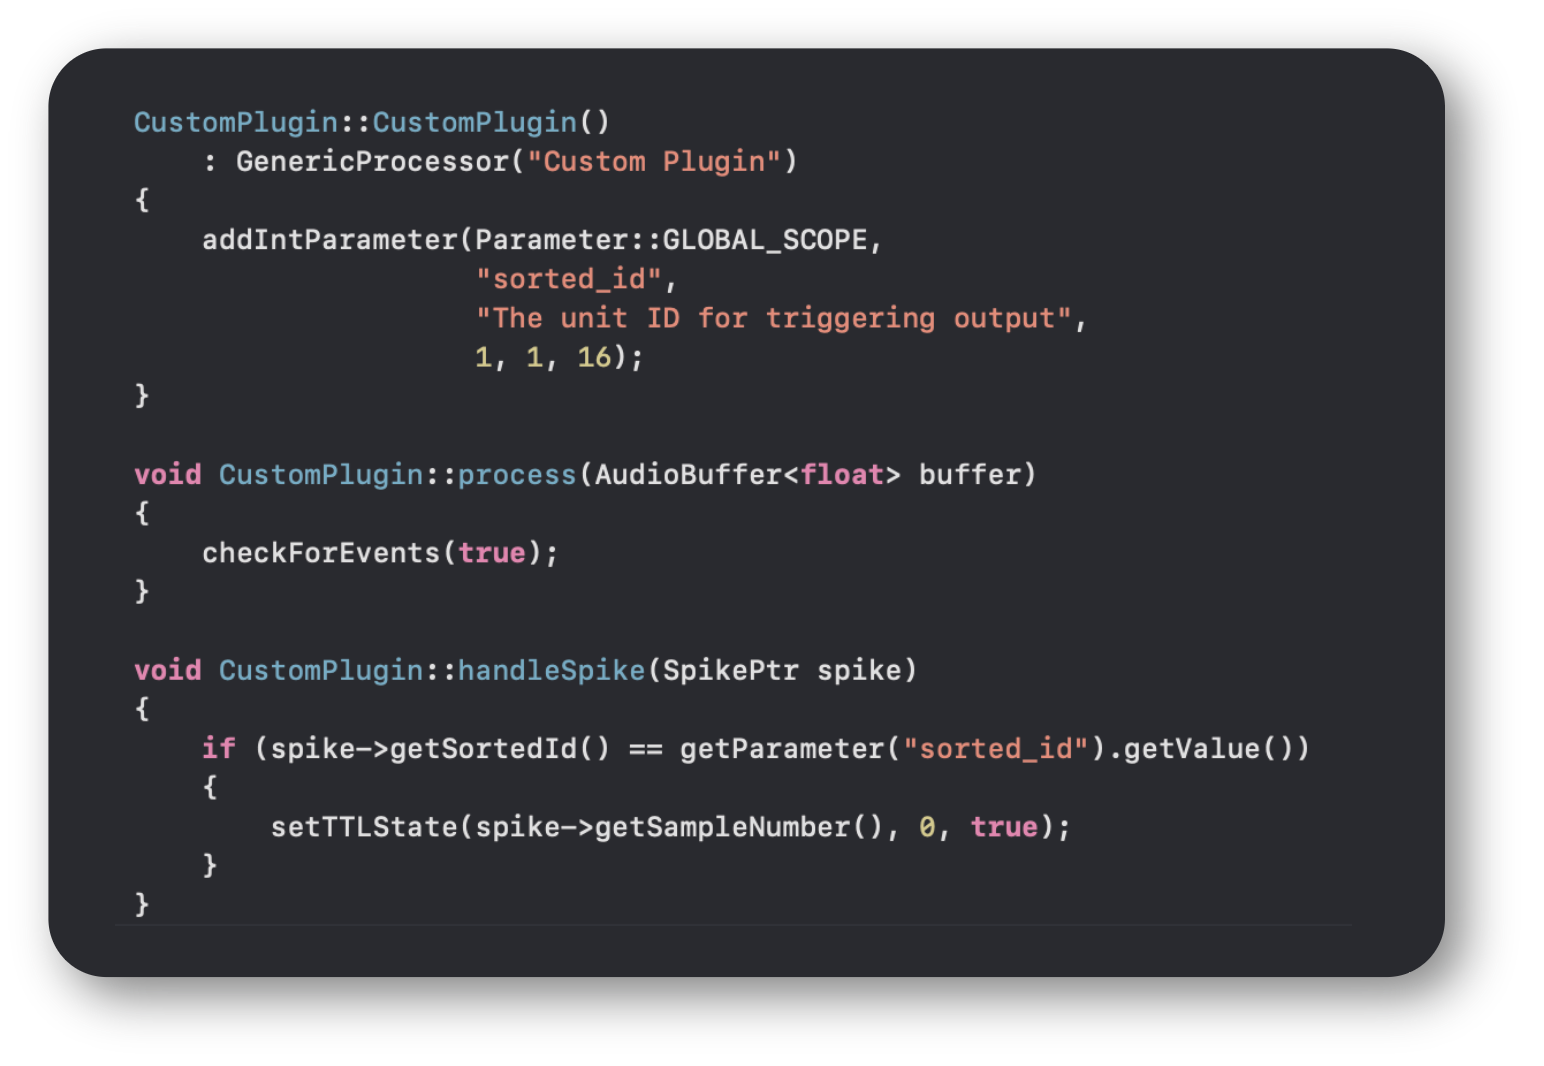
If you know C++ or are willing to learn, adding new features to the GUI is simple. Because the functionality is encapsulated within individual modules, you don't need to understand the entire codebase in order to contribute to development. In fact, new modules can be created by implementing as little as two or three functions (see example code on the left). At a minimum, each processor needs to specify what happens when it receives a block of continuous data. The GUI will handle the rest.
To get started, read through the Developer Guide on the GUI’s documentation site.
A global network of contributors.
Each month, more scientists download our software and start adding features of their own. In this regard, the Open Ephys GUI is unique among applications for acquiring multichannel electrophysiology data. Because it's so flexible, the GUI can be used with any type of data acquisition hardware. It has the potential to become a standard within our field, but only if it gains the support of potential users like you.
See everyone who's forked our repository on GitHub. To try the GUI yourself, download it using the links above, then check out the User Guide.
